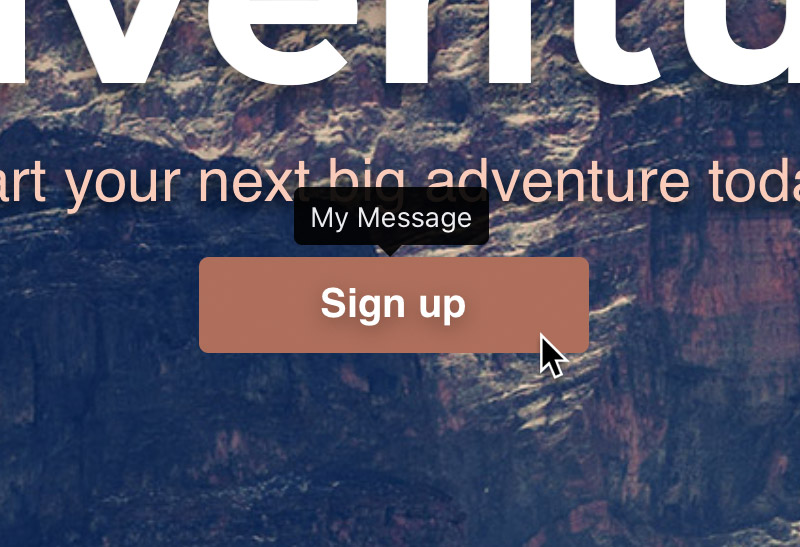
On some occasions you may want to include additional information about an item on your website to help the user understand its purpose. Tooltips are great for this, a tooltip is a small label that will be shown when a user moves the mouse cursor over an item. In Blocs it’s really easy to add a tooltip to anything on a page.
Adding a Tooltip
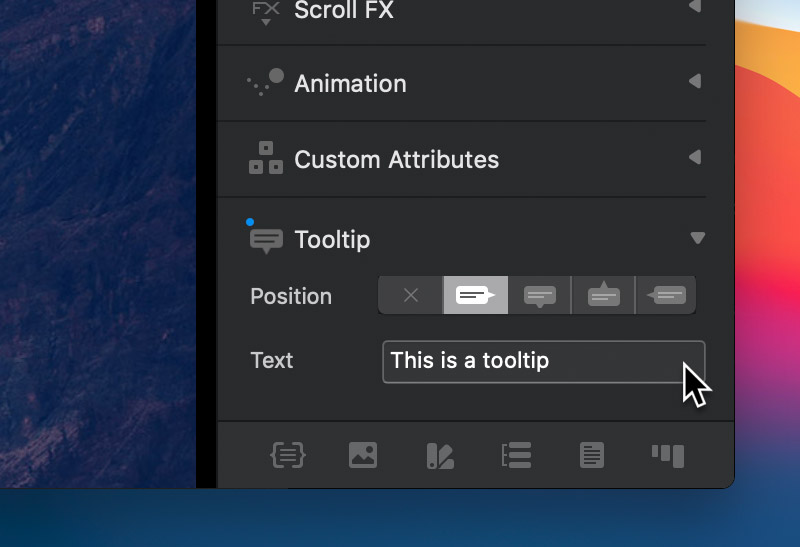
To add a tooltip to an item, first select an item on the design canvas. With an item selected, in the sidebar inspector options, navigate to the section labelled Tooltip. In this section you will find a segmented control labelled Position. By default the position control is set to none. Left Click any of the other segment options to apply a tooltip. You can select to show a tooltip on the Top, Bottom, Left or Right side of an item.

Once you have selected a position for your tooltip, an input field labelled Text will appear below the Position control. The text value of this field is the data that will be shown inside the tooltip when it is displayed. Left Click this field and use your keyboard to enter your own custom text value.
Previewing a Tooltip
To preview your tooltip, first switch into preview mode by pressing the play button located in the main tool bar or by using the keyboard shortcut ⌘+V. Once in preview mode, move the mouse over the object that has the tooltip applied, this will cause the tooltip containing your custom message to be displayed.